ゴッド・オブ・ウァー ラグナロク’ において、 ミュスペルヘイムの試練をすべてクリアせよ
『ゴッド・オブ・ウォー ラグナロク』におけるムスペルヘイムの試練の内側情報を手に入れよう』
“`html
神々の戦争ラグナロクのムスペルヘイムの猛烈な試練を制覇する
その前作と同様に、神々の戦争ラグナロクは新たなムスペルヘイムの挑戦を提供し、ファンを楽しませてくれます。ここはスルトの住処であり、開発チームがあなたのために編み出した相当に厳しい試練に自分の腕前を試すことができる場所です。
もちろん、これらの挑戦は物語を完了し、必要なすべての装備を入手し、自分の満足に向けてそれを強化した後に取り組むのが最善です。合計15のユニークな挑戦をクリアするために、ムスペルヘイムの世界に飛び込んで、一緒に試練に立ち向かいましょう!
最初の6つの挑戦
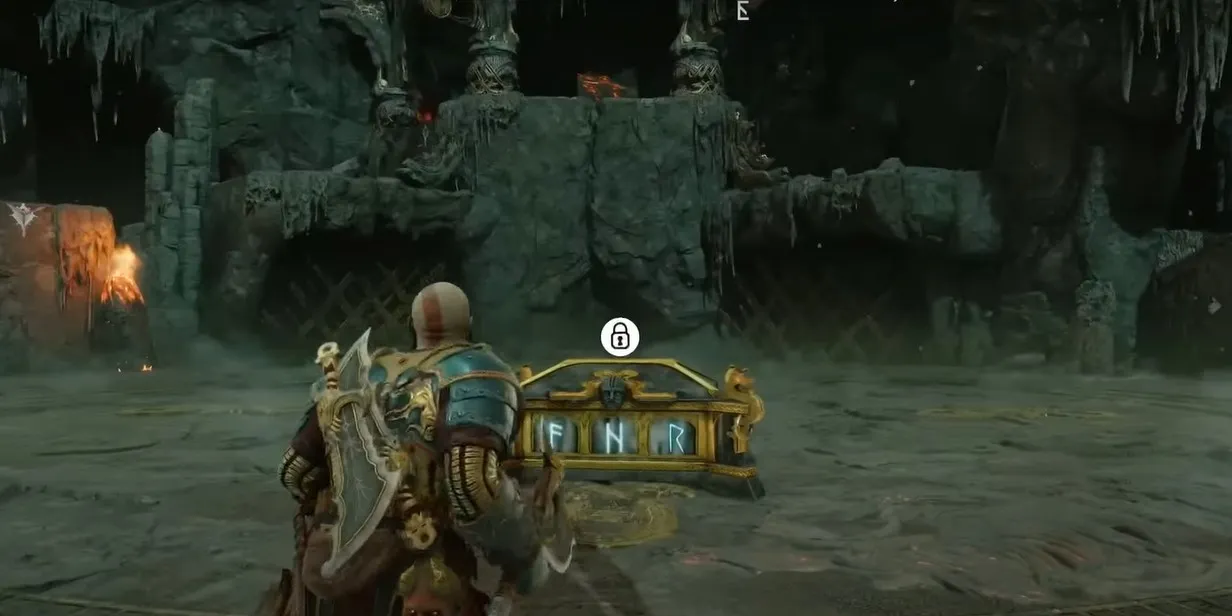
クルーシブルに入ると、ドワーフの店が利用可能で、装備を強化したり切り替えたりすることができます。また、中央にノルニルの宝箱がある大きなオープンなアリーナのようなエリアと、それにつながる3つの経路があります。最初の6つの挑戦をクリアすると、この宝箱が解除されます。
📷 ムスペルヘイムのクルーシブルにいるクレイトスが、ノルニルの宝箱の前にいる
- ファイナルファンタジー7リバースにおけるすべての召喚獣のガイド:パワ...
- コーラルアイランドでスキと結婚する方法:仮想楽園での心温まるラブス...
- ファイナルファンタジー7リバースでの女王の血の究極ガイド 🩸
左、まっすぐ、右に向かう3つの経路があります。それぞれが、最初は2つの試練を含むアリーナにつながっています。各2つの試練をクリアすると、ノルニルの宝箱に1つのルーンが解除されます。
武器の習熟度 – “F”ルーンチャレンジ#1
最初の左側の挑戦、”F”ルーンの試練セットから始めて、右に進んでいきます。武器の習熟度は、ムスペルヘイム全体の中で最も単純な挑戦です。単に、与えられた時間内にあなたに向かってくるすべての敵を排除する必要があります。
合計16体の敵を倒す必要があり、その任務を果たすために180秒が与えられます。一度に全員が襲ってくるのではなく、小さなグループで出現します。
この試練はすべて武器の習熟度にかかっているため、レヴィアサンの斧、カオスの刃、そしてドラウプニルの槍の間を切り替えることが奨励されます。たとえば、アリーナに最初に現れる敵は、体力バーの上に防御氷の盾を持つ盗賊です。これらの悪党たちとは炎のカオスの刃で戦わなければなりません。
逆も同様で、炎の盾バーを持つ敵に遭遇した場合は、氷のレヴィアサンの斧を使用してその炎を和らげます。グレーのシールドバーはドラウプニルの槍で最も速く削られます。すべての敵が消えるまで繰り返します。
これらのシールドは前述の武器のいずれでも損傷を受けることができます。ただし、指示された武器を使用しない場合、ダメージは最小限にとどまり、貴重な秒数を無駄にします。理解しておいてください。
フローレス – “F”ルーンチャレンジ#2
この挑戦は少し危険かもしれません。15体の敵を一撃も受けずに切り抜けなければなりません。ダメージを受けると試練は終了します。ここでは基本的に守りの姿勢を取り、できるだけ敵に息継ぎの機会を与えないようにするのが良いです。時には攻撃的な姿勢が最良の防御です。
試合の開始時に登場するのはナイトメアです。彼らが発射する投射攻撃に気をつけ、軽やかに動き回りましょう。やがて、ドラウグルの戦士が加わります。部屋の真ん中に巨大な石の塊の上に立っているドラウグルに気をつけてください。見逃しがちで、見えない矢が飛んできます。
最後の3体の敵は、Dodher Gradungrと、上からあなたに向けて矢を撃つ2体のドラウグルスカウトです。敵#12を倒した後にそれに注意を払ってください。Nordic bullのようなDodher Gradungerは近距離では難敵です。距離を保ち、自分の投射攻撃、つまりドラウプニルの槍を使って彼を仕留めましょう。
リングアウトチャレンジ – “N”ルーントライアル#1
“““html
This challenge aims to eliminate your enemies by tossing them off cliffs or into lava. In fact, it’s the only way you can eliminate your enemies as they rapidly regain life the moment you hit them with ordinary strikes. There will be 21 eliminations in total that you will need to make here.
There are a number of ways to go about this, but here’s the one sure-fire method to get the job done quickly: Serpent’s Snare. This heavy melee attack with the Leviathan Axe requires you to simply hold R2. Kratos will then bury his axe into an enemy, do a 360-degree spin, and throw the opponent off the wedged blade in whatever direction you are pointing. This challenge is made much simpler by spamming this attack throughout.
You might want to practice using the Serpent’s Snare a few times first to get used to the attack’s wind-up. There’s a bit of timing at play, and you don’t want to leave yourself too vulnerable. After some practice, this attack will be your best friend in this challenge.
For enemies that spawn on ledges, you can easily pull them off by grappling them with the Blades of Chaos, which will eliminate them. Enemies crawling on the ceiling can easily be knocked off with a quick toss of the Draupnir Spear for a simple elimination.
Feed The Rift – “N” Rune Trial #2
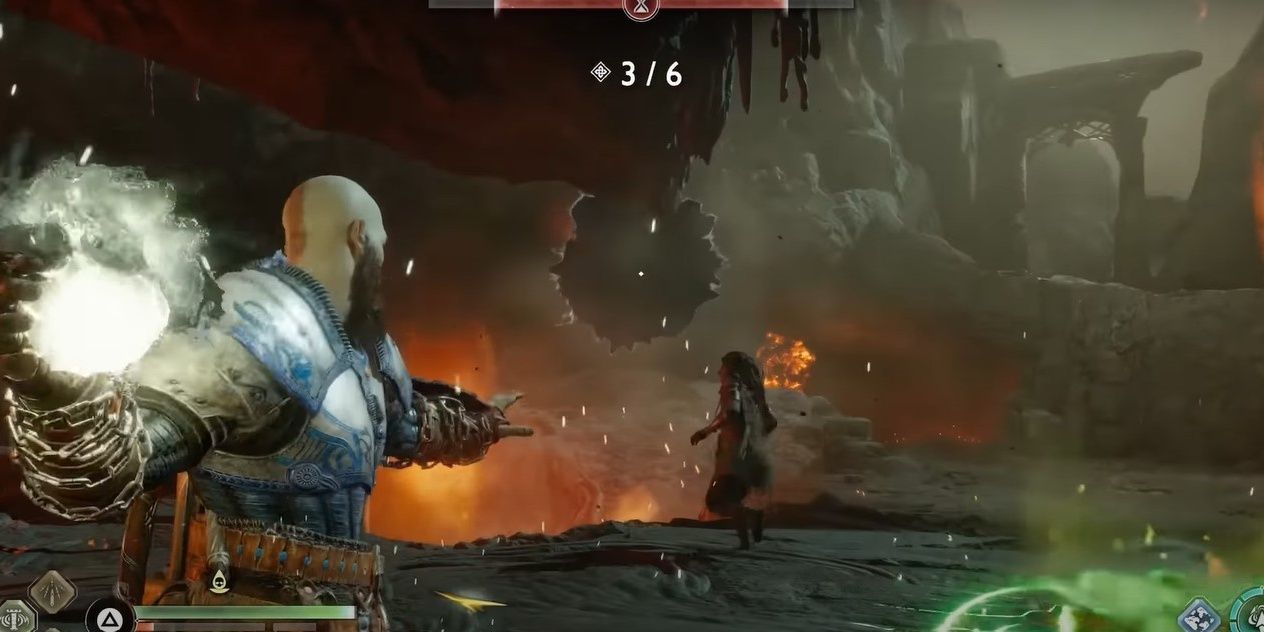
This trial requires you to kill an enemy, pick up an orb that drops in its place, and toss it into a rift hovering over the arena, much like the explosive orbs you collect from hitting an ancient only to lob back at them for more damage. However, you must collect and toss six orbs into the rift in 60 seconds. And then after a short break, you have to collect 15 orbs in 150 seconds.
Do you see the pattern here? You have to make sure you can deal with an enemy, take its orb, and throw it into the rift at a 10-second average. Truthfully, this trial isn’t very difficult if you know how to handle yourself. Just be sure to make use of your companion’s arrows when wisps enter the fray.
📷 Kratos throwing an orb into the rift
Completing the initial Crucible Favour Trials
After finishing the initial six trials, you will be able to access the Nornir chest in the middle of the crucible. Inside, you will find a Chaos Flame to upgrade your Blades with. This will complete the Crucible favor, which should have netted you the Undying Pyres armor set. A sword will then form in the middle of the Crucible. By interacting with it, you will activate The Final Challenges favor.
The Next Three Challenges
In each of the three arenas where you completed two trials to unlock the Nornir chest, a third trial at each sword will now be available.
Rampage Trial
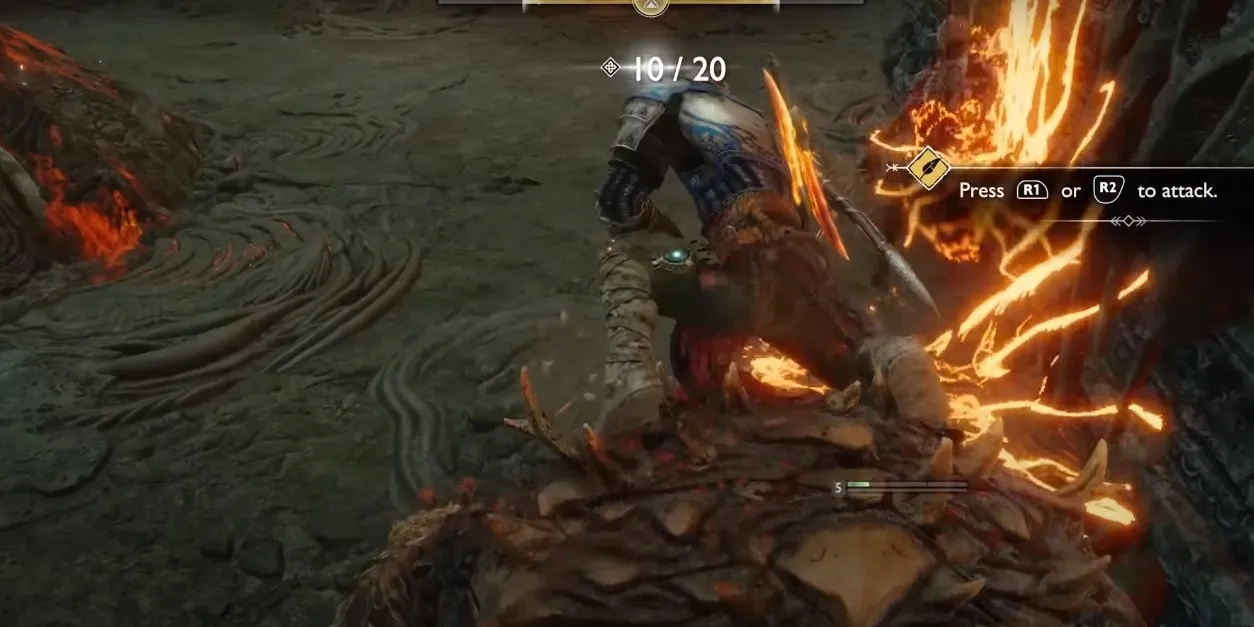
The Rampage Trial is located on the sword with the original “F” Runic trials for the Nornir chest. This trial requires you to defeat 20 enemies in 150 seconds. There are two approaches you can take to this challenge. During the fight, both a Troll and a Bergsra will spawn.
- You can either ignore the heavy-hitting enemies and evade them while destroying the weaker ones to complete the challenge quickly.
- Or, you can target the troll as soon as he enters and then ride on his back, using him to decimate the other enemies in the arena.
📷 Kratos riding a troll in the Rampage trial
Either strategy will bring this trial to a swift end.
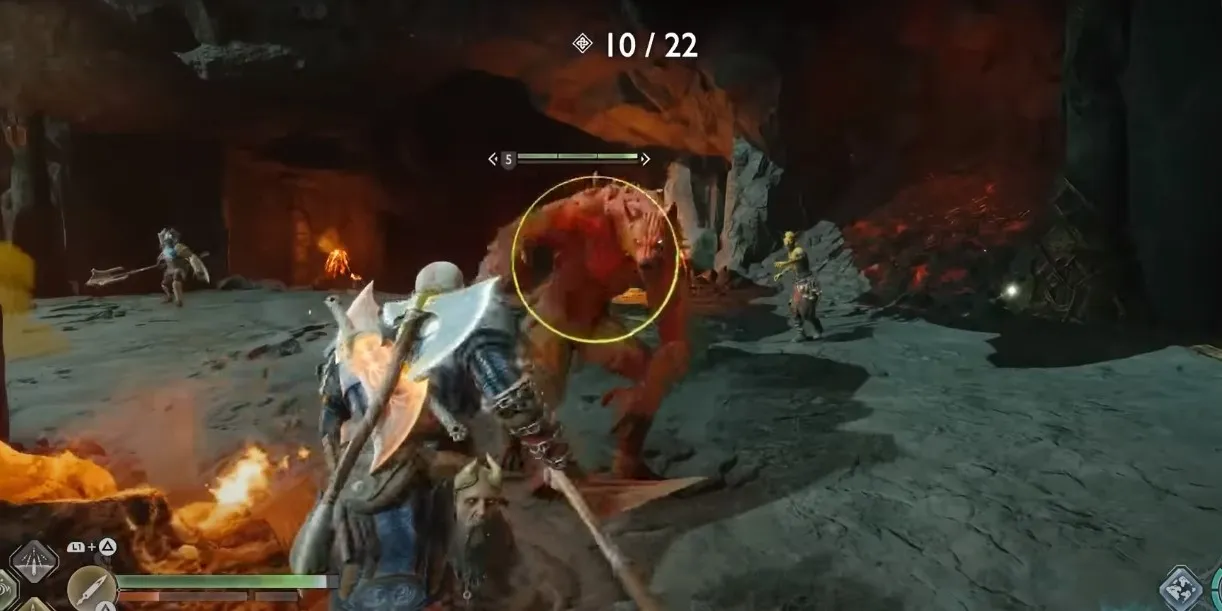
Health Steal Trial
The Health Steal Trial is located at the middle sword where the original “N” runic challenges were available. Like most trials, this is another one that demands you to be quick on your feet.
Your health will depreciate constantly throughout the trial and will only replenish as you kill enemies. Basically, stay alive by quickly killing 22 enemies. There’s no real strategy to this trial other than to be quick and aggressive. Make use of heavy runic attacks to dole out damage quickly to multiple enemies at once.
“`
この挑戦の後半では、Nokkensが生成され、敵を生かしておく。これらの生き物に注意して、彼らが戦いに参加するとすぐに攻撃するよう心がけましょう。
キルフューズトライアル
このトライアルは、最初の“R”ルーントライアルと同じ剣に位置しています。これもタイマー付きの挑戦です。ただし、トリックは敵を倒してタイマーを増やし、ゼロにならないようにすることです。最初は30秒でスタートし、各キルごとに5または10秒を獲得します。
これは非常にシンプルな挑戦で、敵を素早く倒すために強力なルーン攻撃を取り入れる必要があります。小さな敵に対してR3フィニッシャーをしないほうがいいかもしれません。貴重な時間を無駄にしてしまう可能性があります。
📷 キルフューズトライアルでヴァルヴァーを攻撃するクレイトス
このトライアル中に生成される最も難しい敵タイプは、ウルヴァーとダークエルフです。ウルヴァーは速く、打たれ強いです。これらの敵に対して素早く攻撃的に行動しましょう。
最後の6つのトライアル
最後の6つのトライアルは、他の3つの剣で一連のトライアルを実行することでクルセイブルの中央の剣でのみアンロックされます。組み合わせは単純に3つの剣だけに依存しており、それらが含む試練には関係ありません。従って、各剣で可能な3つのトライアルのうちいずれかを選択して、これらの組み合わせを達成できます。簡単に新たにアンロックされた挑戦に移動するためのトライアルを選択しましょう。
各チャレンジをアンロックするための組み合わせは以下の通りです:
- 剣1 + 剣2:忍耐チャレンジ
- 剣1 + 剣3:シールドブレイカーチャレンジ
- 剣2 + 剣3:猛攻チャレンジ
- 剣3 + 剣1:炎の輪チャレンジ
- 剣3 + 剣2:ファントムチャレンジ
- 剣2 + 剣1:ボスラッシュチャレンジ
忍耐チャレンジ
このチャレンジはミュスペルヘイムで最も長いチャレンジの1つかもしれません、そのためタイトルに「忍耐」という言葉が含まれています。要するに、死なずに99体の敵を倒す必要があります。
長期戦を想定して、戦いを終えるのに役立ついくつかのヒントがあります:
- 守りを固める。パリングや防御技術を磨いておきましょう。
- わからないときは回避。敵に押されたり予期せず襲われたときに救いの手としてこの動作をデフォルトにします。
- 防御力や体力を強化するアイテムやアーマーセットを装備します。
- 再生のエッセンスのアミュレットのエンチャント:これにより徐々に体力が回復します。
- ステインビョルンのアーマーセット:このアーマーセットはゲーム全体で最も防御力の高いアーマーです。このセットの胸部アーマーは、クレイトスが一時的に体力を回復できるようになります。ここでは役立ちます。
- ニダヴェリアの最高級アーマーセット:このアーマーセットは敵を気絶させることにボーナスを提供します。クレイトスは敵を気絶させることで一部の体力が回復することができます。
- おそらく、スパルタンレイジオプションをヴァーロールに切り替え、体力と引き換えることができるようにします。
シールドブレイカーチャレンジ
その名の通り、エリート敵の鉄壁のシールドを打ち破るために彼と共に現れる足軽を倒す必要があります。一度にアリーナに入る敵はエリートと共にわずかです。足軽を排除した後、追加の足軽が現れる前に一定の時間エリートを攻撃することができます。
最初のエリートはアインヘリヤルのチャンピオンです。2番目はストーカーです。これらの敵の攻撃に特別なものはありません。単に彼らのシールドを破壊して脆弱にする必要があります。
猛攻チャレンジ
このトライアルでは、300秒間限りなく敵があなたに投げかけられます。また、サークル内に留まることが求められます。明らかに、サークル外に移動すると炎によるダメージが加えられ、最終的に死に至ります。
これは、忍耐チャレンジで言及した防御と健康回復ギアを活用すべき別の挑戦です。忍耐チャレンジで紹介したアーマーセットを装備し、スパルタンヴァーロールを活用してください。慎重に戦略化されていれば、防御的な姿勢をとるかパリングを通じて攻撃を跳ね返すことで、クロックを走らせることができます。
“`html
A troll will enter the arena at one point. Riding on his back is another way to kill time while being in a safe position. The Wyverns are especially aggressive, and the troll would be a great weapon to use against them.
リング・オブ・ファイア・チャレンジ
The Ring of Fire Challenge makes use of the same ring you dealt with in the Onslaught challenge, with a few exceptions. You must defeat 15 enemies while staying inside the circle. However, the ring will move around the arena. It will even force you into areas with poisonous totems that you must freeze with your axe.
Of course, stepping into the lava will cause Kratos constant damage. Though, if a health shard drops outside the circle, it may be worth it to suffer minor damage to claim the health boost, which would likely exceed the damage you’ve taken.
The two toughest enemies that will spawn in this challenge are a wulver and a wyvern. A wyvern might be better dealt with using long-distance attacks like Draupnir spear, especially because it tends to wander outside the circle. Wulvers are known to rush Kratos and attack with quick, damaging slashes. Unleash a combo with the Blades of Chaos that will keep the wulver stunned.
ファントム・チャレンジ
Like other phantoms throughout the game, Kratos will have to take on a fire elemental phantom. In the same pattern as past phantoms, you must take out the pillars glowing purple once you stun the phantom. Enemies will spawn into the arena at this point, but focus on the pillars first.
Once the pillars are eliminated, you can destroy the phantom and finish off the enemies. In battling the phantom, default to dodging as its slamming attacks can be devastating. Otherwise, pummel the elemental orb and destroy it like you would any other phantom.
A dodher beast will spawn with a fire shield. Remember that using the Leviathan Axe against a fire shield is most effective, though you can use the other weapons if you prefer. Other opponents that will spawn will include various draugr enemy types.
ボス・ラッシュ・チャレンジ
Just as the name implies, you will have to defeat five elite-type enemies one after the other. No ordinary enemies will spawn in this challenge. You will simply fight each elite enemy one at a time. In order, the enemies that you will fight are a Traveler, a Fierce Stalker, a Dark Elf Lord, a Light Elf Warrior, and an Einherjar Brute.
Any chance for healing will either come from your Spartan Valor, items equipped, or the health shard that will drop from each fallen elite. So, be cautious.
There’s nothing special about these fights. There’s no time limit or fire ring. Simply use the same attack patterns and strategies you’d employ when fighting these enemies in the mainline story. Just be wary of your health. Once again, refer to the Endurance Challenge guide for references to useful items that can boost your defense or health.
That’s it! You now have a comprehensive guide to conquering the fiery trials of Muspelheim in God of War Ragnarok. Put your skills to the test and emerge victorious. Good luck, warrior!
Q&A Content:
Q: Are there any specific gear and upgrades I should focus on before attempting the Muspelheim challenges?
Before diving into the Muspelheim challenges, it’s crucial to have upgraded gear and abilities. Focus on upgrading your preferred weapons, such as the Leviathan Axe, Blades of Chaos, and the Draupnir Spear. Additionally, consider equipping armor sets that enhance defense or provide health regeneration, like the Steinbjorn or Nidavellir’s Finest sets.
Q: What strategies can I use to stay alive and succeed in the Muspelheim challenges?
To stay alive and succeed in the Muspelheim challenges, prioritize defensive maneuvers like dodging and parrying. Play it safe and avoid taking unnecessary risks. Utilize runic attacks and combos to quickly dispatch enemies. It’s also beneficial to have a good understanding of each enemy type’s weaknesses and adjust your tactics accordingly.
Q: Are there any rewards or special items I can obtain by completing the Muspelheim challenges?
Yes! By completing the initial Crucible Favour Trials, you will unlock the Nornir chest in the middle of the crucible. Inside, you’ll find a Chaos Flame to upgrade your Blades with. There are also unique armor sets, such as the Undying Pyres set, that you can acquire by completing certain challenges. These rewards provide additional bonuses and enhance your overall combat abilities.
“““html
Q: どの順で挑戦することができますか、それとも特定の進行順序に従う必要がありますか?
お好きな順番で挑戦する自由があります。ただし、特定の進行順序に従うことで、追加のチャレンジを解除しやすくなります。たとえば、2本の異なる剣からのチャレンジを完了した後、新しいチャレンジが Crucible の中央の剣で解除されます。各チャレンジを解除するための組み合わせについては記事を参照してください。
Q: チャレンジ中に遭遇する特定の敵のタイプを処理するためのヒントはありますか?
Muspelheim のチャレンジに登場する各敵のタイプには独自の特徴と弱点があります。戦略を適応させることが重要です。炎のシールドを持つ敵には、レヴィアサンの斧を使用して炎に対抗します。氷のシールドを持つ敵は、カオスの刃に弱く、灰色のシールドを持つ敵はドラプニルの槍を使用して最も効果的に対処します。さまざまな武器を試して、各敵のタイプを打倒する最も効果的な方法を学んでください。
参考文献:
“`

